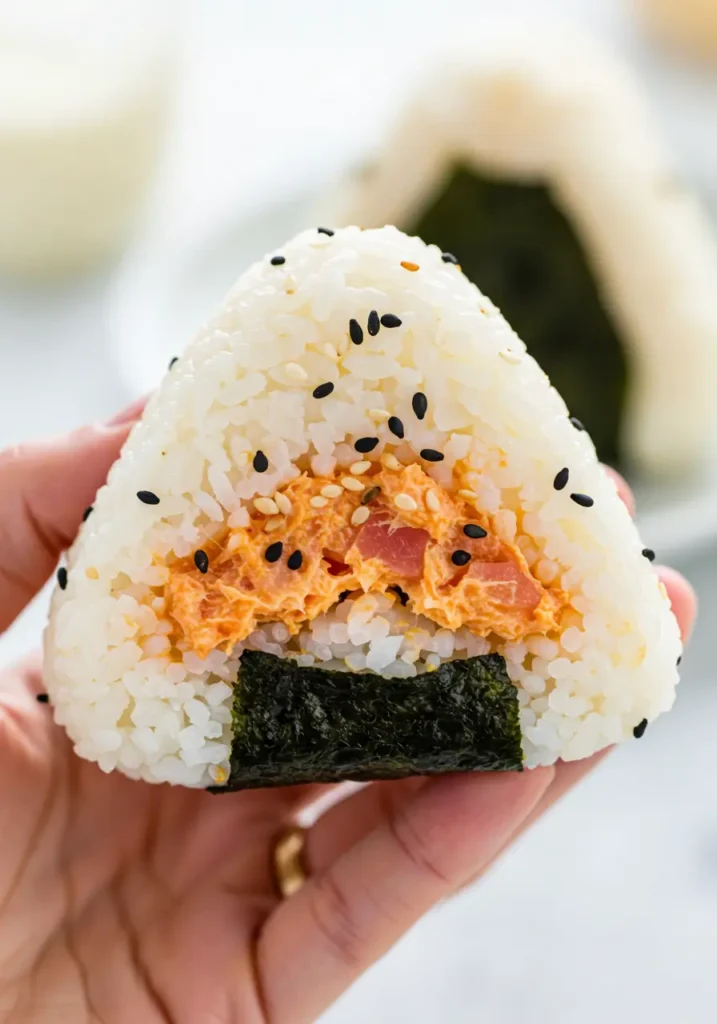
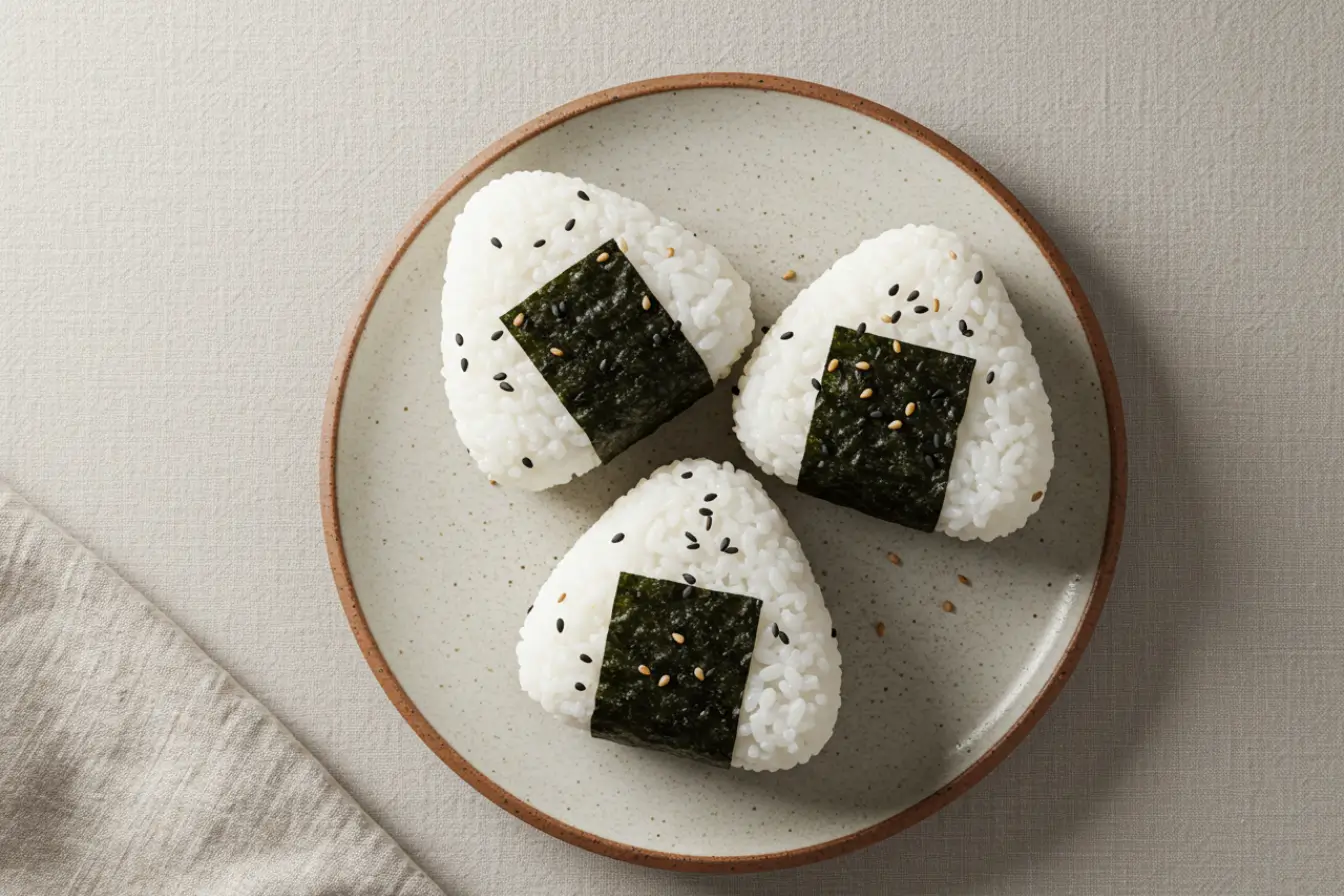
These Japanese Tuna Onigiri are little bundles of joy, made from seasoned sushi rice, filled with a creamy tuna mayo mixture, and wrapped in crisp nori. They are the perfect portable snack or light lunch, bringing a taste of authentic Japanese home cooking to your kitchen. This easy recipe will help you craft perfect rice balls every time.
My sister Jennifer has always been the more adventurous one in the kitchen. I remember one rainy Saturday, we decided to try making our own onigiri after binge-watching a Japanese cooking show. Our first few attempts were clumsy, misshapen rice balls that fell apart if you even looked at them. We laughed so hard, with rice sticking to our fingers and cheeks. But when we finally shaped that first perfect triangle, filled with savory tuna, it felt like the greatest accomplishment. That memory, filled with joy and sisterly fun, is what I cherish every time I make these.
Sarah’s Golden Rules for Perfect Onigiri
- Use the Right Rice: Japanese short-grain (sushi) rice is a must for this recipe, as its sticky texture is what holds the onigiri together.
- Wet Your Hands: To prevent the rice from sticking to your hands while shaping, keep a small bowl of water nearby to keep your palms damp. A little salt on your palms also helps with flavor and preservation.
- Don’t Overfill: A common mistake is adding too much filling, which can cause the rice balls to fall apart. About a teaspoon of the tuna mixture is the perfect amount.
- Press Firmly but Gently: The key to a well-shaped onigiri is to apply firm, consistent pressure without mashing the rice grains.
- Wrap Nori Later for Crispiness: If you prefer your nori crisp, wrap the onigiri just before serving.
Gathering Our Ingredients
- 2 cups Japanese short-grain rice (sushi rice)
- 2 1/4 cups water
- 1/2 teaspoon salt
- 1 tablespoon rice vinegar
- 1 (5 oz) can tuna, drained
- 2 tablespoons mayonnaise
- 1/2 teaspoon soy sauce (optional)
- 1/4 teaspoon chili paste (optional for spicy version)
- 2–3 sheets nori, cut into strips
- Toasted sesame seeds for garnish
A Little Help From My Kitchen Drawer
Before we begin, here are two simple tools that I find make the process a little easier.
Onigiri Mold
While shaping by hand is traditional, an onigiri mold makes it incredibly easy to get that perfect, uniform triangle shape every time.
Rice Paddle
A rice paddle is essential for fluffing and mixing the rice without crushing the delicate grains.
Bringing Our Onigiri to Life, Step by Step
First, A Gentle Start for Our Rice
First, rinse the rice under cold water until it runs clear. Then, combine the rinsed rice and water in your rice cooker or a pot and cook it according to the package directions. I find letting it cool just enough so you can handle it is the sweet spot.
Next, The Heart of Our Onigiri: The Tuna Filling
While the rice cools a bit, mix the drained tuna, mayonnaise, and soy sauce in a small bowl. If you’re feeling a bit daring like my sister, add the chili paste for a delicious spicy kick.
Adding a Little Magic to the Rice
In a separate large bowl, gently season the warm rice with the salt and rice vinegar. Use a rice paddle to toss it gently, being careful not to mash the grains. Every grain should be perfect!
Now, The Best Part: Shaping by Hand
Now for the fun part! Wet your hands with water and add a little sprinkle of salt to your palms to keep the rice from sticking. Take a handful of rice and make a small dent in the middle.
Tucking the Filling Snugly Inside
Add about a teaspoon of the tuna mixture into the dent you just made. Gently mold the rice around the filling, forming it into a triangle or a ball shape. Remember to press gently but firmly to make sure it holds together.
Dressed in Nori and Sesame
Wrap a strip of nori around the bottom of each onigiri. I love to sprinkle a few toasted sesame seeds on top for a little extra flavor and crunch.
Ready to Eat or Pack Away
These are best served immediately, but they are also perfect for meal prep. Just wrap each onigiri individually in plastic wrap for a bento box or a quick snack on the go.

A Quick Note on Nutrition
Please note that the nutritional information provided is an estimate and can vary based on the specific ingredients and quantities used. For precise nutritional values, I recommend using an online calculator with your exact ingredients.
For a Lighter Touch
- Brown Rice Power: For a healthier, fiber-rich option, you can substitute the white sushi rice with short-grain brown rice.
- Mayo Swap: Replace the mayonnaise with Greek yogurt or mashed avocado for a creamy texture with fewer calories and more nutrients.
- Go for Salmon: Canned salmon is a wonderful and healthy alternative to tuna, offering a rich source of omega-3 fatty acids.
How We Love to Serve Them
- With Miso Soup: A warm bowl of miso soup is the classic and comforting pairing for onigiri.
- Alongside a Fresh Salad: I love serving these rice balls with a simple cucumber salad dressed with a bit of sesame oil and rice vinegar for a light and refreshing meal.
- As the Star of a Bento Box: Onigiri are the star of any bento box. Pair them with tamagoyaki (Japanese rolled omelet), edamame, and pickled vegetables for a complete and beautiful meal.
A Few Little Stumbles to Avoid
- Using the Wrong Rice: Long-grain rice isn’t sticky enough and your onigiri will fall apart. Be sure to use Japanese short-grain rice.
- Using Cold Rice: Warm, freshly cooked rice is essential for getting the grains to stick together properly. Don’t try to make onigiri with leftover, cold rice from the fridge unless you reheat it first.
- Forgetting to Wet Your Hands: If you skip this step, the rice will stick to your hands, making a mess and making it impossible to shape the balls neatly.
Keeping Them Fresh for Later
To store your onigiri, wrap each one individually and tightly in plastic wrap. This prevents the rice from drying out. They can be stored in the refrigerator for up to two days, though they are best enjoyed as fresh as possible. If the rice seems a little hard after refrigerating, you can microwave it for a few seconds to soften it up.
From My Kitchen to Yours
There is something so special about food made with your own two hands. These simple Japanese Tuna Onigiri are more than just a recipe; they’re a chance to create something wonderful and make memories in your own kitchen. I hope you find as much joy in shaping these little rice balls as my sister and I did on that rainy afternoon.
Your Questions, Answered with Love
What other fillings can I try?
Absolutely! Onigiri are incredibly versatile. Some other popular fillings include grilled salmon, pickled plum (umeboshi), or even leftovers like teriyaki chicken.
How do I get a crispy, grilled onigiri?
That’s called yaki onigiri, and it’s delicious! After shaping your onigiri, simply pan-fry them in a lightly oiled skillet over medium heat until golden and crispy on both sides. You can brush them with a little soy sauce during the last minute of cooking for extra flavor.
Does the type of rice really matter that much?
It truly does. It’s best to use Japanese short-grain rice, often labeled as sushi rice. Its high starch content makes it sticky, which is crucial for helping the rice balls hold their shape. Long-grain rice varieties like jasmine or basmati are not sticky enough and will likely fall apart.
Print
Japanese Tuna Onigiri
- Total Time: 45 minutes
- Yield: 8 onigiri 1x
Description
Delicious Japanese Tuna Onigiri made from seasoned sushi rice, filled with a creamy tuna mayo mixture, and wrapped in crisp nori for the perfect snack or light lunch.
Ingredients
- 2 cups Japanese short-grain rice (sushi rice)
- 2 1/4 cups water
- 1/2 teaspoon salt
- 1 tablespoon rice vinegar
- 1 (5 oz) can tuna, drained
- 2 tablespoons mayonnaise
- 1/2 teaspoon soy sauce (optional)
- 1/4 teaspoon chili paste (optional for spicy version)
- 2–3 sheets nori, cut into strips
- Toasted sesame seeds for garnish
Instructions
- Rinse rice under cold water until clear, then cook with water according to package directions. Let cool until warm and handleable.
- In a bowl, mix drained tuna, mayonnaise, and soy sauce. Add chili paste for a spicy kick if desired.
- In a large bowl, season warm rice with salt and rice vinegar, gently tossing with a rice paddle.
- Wet hands and sprinkle with salt. Take a handful of rice and form a small dent in the center.
- Add about a teaspoon of the tuna mixture into the dent and gently shape the rice into a triangle or ball.
- Wrap a strip of nori around the bottom and sprinkle toasted sesame seeds on top.
- Serve immediately or wrap individually in plastic wrap for later.
Notes
Use Japanese short-grain rice for best results. Wrap nori just before serving to keep it crisp. Store wrapped onigiri in the fridge for up to two days.
- Prep Time: 20 minutes
- Cook Time: 25 minutes
- Category: Snack
- Method: No Cook / Rice Cooker
- Cuisine: Japanese
Nutrition
- Serving Size: 1 onigiri
- Calories: 180
- Sugar: 0g
- Sodium: 250mg
- Fat: 6g
- Saturated Fat: 1g
- Unsaturated Fat: 4g
- Trans Fat: 0g
- Carbohydrates: 24g
- Fiber: 1g
- Protein: 6g
- Cholesterol: 10mg
Keywords: onigiri, tuna, rice ball, Japanese snack, sushi rice, tuna mayo

