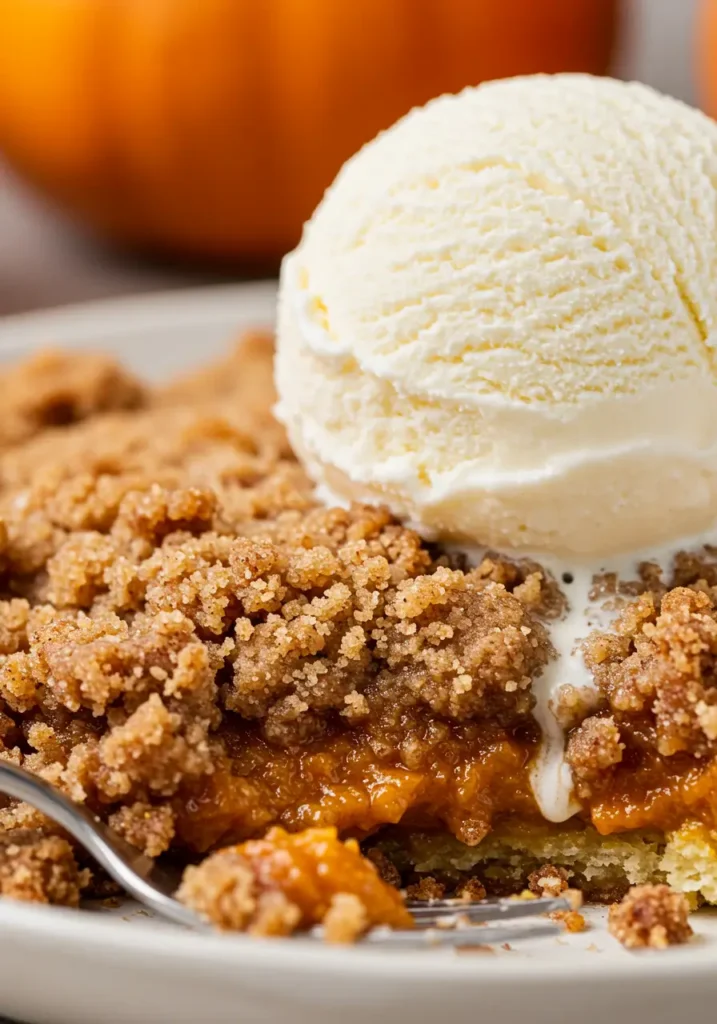
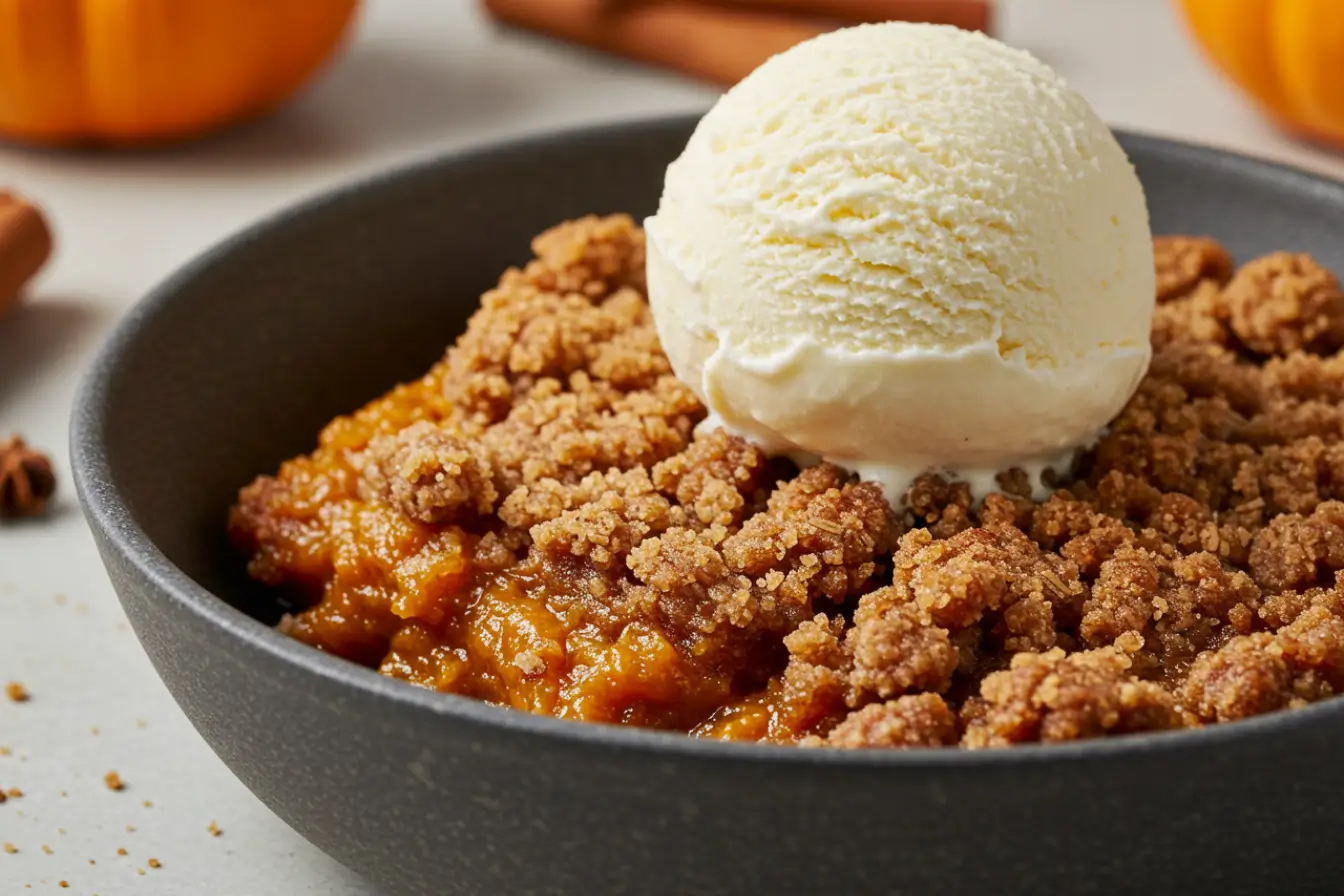
This Pumpkin Crisp Recipe is the perfect way to welcome autumn, combining a creamy, spiced pumpkin filling with a crunchy, buttery oat topping. It’s a simple, comforting dessert that brings all the best fall flavors to your table.
My sister Jennifer has always been the queen of fall. While I’d still be clinging to the last days of summer, she would be the first to pull out a cozy sweater and declare it “baking season.” I remember one particularly crisp Saturday, the first real day of autumn, when she insisted we make this. The scent of cinnamon and pumpkin filled Mom’s kitchen, and we couldn’t resist sneaking spoonfuls of the crumbly topping before it even went into the oven. That warmth, that simple joy, that’s what this crisp tastes like to me.
KEY TAKEAWAYS
- Effortless Elegance: This dessert looks impressive but comes together with simple, common pantry ingredients in just a few steps.
- The Best of Both Worlds: It offers the creamy, custard-like texture of a pumpkin pie with the irresistible crunchy, crumbly topping of a classic fruit crisp.
- Perfect for a Crowd: Baked in a 9×13 inch dish, this recipe yields about 12 servings, making it ideal for holiday gatherings, potlucks, or a simple family dessert night.
- Aromatic & Cozy: The blend of cinnamon, nutmeg, ginger, and cloves will fill your home with the quintessential scent of autumn.
Ingredients List
For the Pumpkin Filling:
- 1 can (15 oz) pumpkin purée
- 1 can (12 oz) evaporated milk
- 3 large eggs
- 3/4 cup granulated sugar
- 1/4 cup brown sugar, packed
- 2 teaspoons ground cinnamon
- 1/2 teaspoon ground nutmeg
- 1/2 teaspoon ground ginger
- 1/4 teaspoon ground cloves
- 1 teaspoon vanilla extract
- Pinch of salt
For the Crisp Topping:
- 1 cup all-purpose flour
- 1 cup old-fashioned oats
- 1 cup brown sugar, packed
- 1 teaspoon ground cinnamon
- 1/2 cup unsalted butter, melted
Step-by-Step Instructions
Step 1: Prepare the Oven and Dish
First, preheat your oven to 350°F (175°C) and lightly grease a 9×13 inch baking dish. Getting everything ready beforehand makes the whole process feel so much calmer and more enjoyable.
Step 2: Mix the Pumpkin Filling
In a large bowl, whisk together the pumpkin purée, evaporated milk, eggs, both sugars, all those lovely spices, vanilla, and a pinch of salt. Keep whisking until it’s perfectly smooth and has a beautiful, deep orange color.
Step 3: Pour the Filling
Next, pour that silky pumpkin mixture evenly into your prepared baking dish. I like to use a spatula to make sure I get every last drop from the bowl and to smooth the top just so.
Step 4: Prepare the Crisp Topping
In a separate bowl, it’s time to make the magic happen. Combine the flour, old-fashioned oats, brown sugar, and cinnamon. Gently stir in the melted butter with a fork until you have a lovely, crumbly mixture. Don’t overmix; you want those nice little clumps.
Step 5: Add the Topping
Now for the best part! Sprinkle the crisp topping evenly all over the pumpkin filling. Be generous and make sure it covers the filling from edge to edge.
Step 6: Bake to Golden Perfection
Place the dish in your preheated oven and bake for 45–50 minutes. You’ll know it’s ready when the filling is set (it should only have a slight jiggle in the center) and the topping is a beautiful golden brown.
Step 7: Cool and Serve
Let the crisp cool on a wire rack for at least 15 minutes before serving. It’s absolutely divine served warm, especially with a scoop of vanilla ice cream or a dollop of fresh whipped cream.

Nutritional Information
Please note that the nutritional information provided is an estimate and can vary based on the specific ingredients and brands you use. The values are calculated per serving for your general guidance.
Healthier Alternatives for the Recipe
- Reduce the Sugar: You can comfortably reduce the granulated sugar in the filling to 1/2 cup and the brown sugar in the topping to 3/4 cup without a major impact on the final texture.
- Swap the Flour: For a nuttier flavor and a bit more fiber, try substituting half of the all-purpose flour in the topping with whole wheat flour or white whole wheat flour.
- Butter Alternative: If you prefer, you can substitute the melted butter in the topping with an equal amount of melted coconut oil for a slightly different, delicious flavor.
Serving Suggestions
- A La Mode: The classic way to serve this crisp is warm with a generous scoop of vanilla bean ice cream. The contrast between the warm, spiced pumpkin and the cool, creamy ice cream is simply heavenly.
- Caramel Drizzle: For an extra touch of indulgence, drizzle a little warm salted caramel sauce over the top just before serving.
- With Coffee or Tea: This crisp makes a wonderful afternoon treat alongside a hot cup of coffee or a spiced chai tea. It’s the perfect way to slow down and enjoy a quiet moment.
Common Mistakes to Avoid
- Using Pumpkin Pie Filling: Be sure to use 100% pure pumpkin purée, not pumpkin pie filling. The pie filling is already sweetened and spiced, which will make your dessert overly sweet and throw off the flavor balance.
- Overbaking the Filling: Keep a close eye on the crisp as it bakes. If you bake it too long, the filling can become dry and cracked instead of creamy and custard-like. It’s done when the center is just barely set.
- A Soggy Topping: The key to a “crisp” topping is using cold or slightly cooled melted butter and not overmixing it. You want to create crumbly pieces, not a paste. This ensures it bakes up crunchy, not soft.
Storing Tips for the Recipe
Once the pumpkin crisp has cooled completely, cover the baking dish tightly with plastic wrap or aluminum foil. It can be stored in the refrigerator for up to 4 days. You can enjoy it cold straight from the fridge, or reheat individual portions in the microwave for about 30-45 seconds until warm.
From My Kitchen to Yours
There’s something so special about the way a simple recipe can fill a home with warmth and bring people together. I hope this Pumpkin Crisp becomes a part of your family’s autumn traditions, just as it is in mine. May it bring you as much comfort and joy as it has always brought my sister and me. Happy baking!
FAQs
Can I use fresh pumpkin purée?
Yes, you certainly can! Just be sure that the homemade purée is thick and not watery. You may need to strain it through a cheesecloth to remove excess moisture so the filling sets properly. The taste of fresh pumpkin is absolutely wonderful.
Is it possible to make this recipe gluten-free?
Absolutely. To make this crisp gluten-free, simply substitute the all-purpose flour in the topping with a good quality one-to-one gluten-free baking flour blend and use certified gluten-free old-fashioned oats.
Can I prepare this pumpkin crisp ahead of time?
This is a great make-ahead dessert! You can bake it a day in advance, let it cool, cover, and refrigerate it. When you’re ready to serve, you can either enjoy it cold or warm it in a 300°F (150°C) oven for about 15-20 minutes.
Print
Pumpkin Crisp Recipe
- Total Time: 65 minutes
- Yield: 12 servings 1x
Description
This Pumpkin Crisp Recipe is the perfect way to welcome autumn, combining a creamy, spiced pumpkin filling with a crunchy, buttery oat topping. It’s a simple, comforting dessert that brings all the best fall flavors to your table.
Ingredients
- For the Pumpkin Filling:
- 1 can (15 oz) pumpkin purée
- 1 can (12 oz) evaporated milk
- 3 large eggs
- 3/4 cup granulated sugar
- 1/4 cup brown sugar, packed
- 2 teaspoons ground cinnamon
- 1/2 teaspoon ground nutmeg
- 1/2 teaspoon ground ginger
- 1/4 teaspoon ground cloves
- 1 teaspoon vanilla extract
- Pinch of salt
- For the Crisp Topping:
- 1 cup all-purpose flour
- 1 cup old-fashioned oats
- 1 cup brown sugar, packed
- 1 teaspoon ground cinnamon
- 1/2 cup unsalted butter, melted
Instructions
- Preheat oven to 350°F (175°C) and lightly grease a 9×13 inch baking dish.
- Whisk together pumpkin purée, evaporated milk, eggs, granulated sugar, brown sugar, cinnamon, nutmeg, ginger, cloves, vanilla, and salt until smooth.
- Pour mixture into prepared baking dish and smooth the top.
- In a separate bowl, combine flour, oats, brown sugar, and cinnamon. Stir in melted butter with a fork until crumbly.
- Sprinkle topping evenly over pumpkin mixture.
- Bake for 45–50 minutes until filling is set and topping is golden brown.
- Cool at least 15 minutes before serving. Best served warm with ice cream or whipped cream.
Notes
Use pure pumpkin purée, not pumpkin pie filling. Don’t overbake the filling, and avoid overmixing the topping to keep it crisp.
- Prep Time: 15 minutes
- Cook Time: 50 minutes
- Category: Dessert
- Method: Baked
- Cuisine: American
Nutrition
- Serving Size: 1 portion
- Calories: 310
- Sugar: 28g
- Sodium: 160mg
- Fat: 12g
- Saturated Fat: 7g
- Unsaturated Fat: 4g
- Trans Fat: 0g
- Carbohydrates: 46g
- Fiber: 3g
- Protein: 5g
- Cholesterol: 55mg
Keywords: pumpkin crisp, autumn dessert, fall baking, pumpkin recipes, holiday dessert

